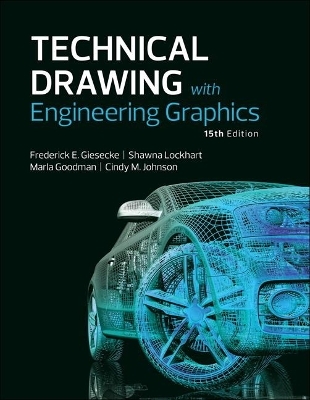
Technical Drawing with Engineering Graphics
Peachpit Press Publications (Verlag)
978-0-13-430641-4 (ISBN)
- Titel erscheint in neuer Auflage
- Artikel merken
Features:
Splash Spread: Appealing chapter opener provides context and motivation.
References and Web Links: Useful weblinks and standards provided upfront in each chapter.
Understanding Section: Foundational introductions, tabbed for easy navigation, outline each topic’s importance, use, visualization tips, and theory.
Detail Section: Detailed, well-tested explanations of drawing techniques, variations, and examples–organized into quick-read sections, numbered for easy reference.
CAD at Work Section: Breakout pages offer tips on generating drawings from 2D or 3D models.
Portfolio Section: Examples of finished drawings show how techniques are applied in the real world.
Key Words: Italicized on first reference, summarized after each chapter.
Chapter: Summaries and Review Questions: Efficiently reinforce learning.
Exercises: Outstanding problem sets with updated exercises, including parts, assembly drawings from CAD models, sketching problems, and orthographic projections.
Chapter One The Worldwide Language for Graphic Design
Understanding the Role of Technical Drawings
1.1Graphics Tools in Action
1.2Rapid Prototyping
1.3Drafting Standards
1.4Creativity Techniques
1.5Product Definition
1.6Showing the Design Process in a Portfolio
Chapter TWO Layouts and Lettering
Understanding Projections
2.1Alphabet of Lines
2.2Freehand Lines
2.3Measurement Systems
2.4Drawing Scale
2.5Specifying the Scale on a
Drawing
2.6Lettering
2.7Lettering Standards
2.8Using Guidelines for Hand
Lettering
2.9Vertical and Inclined Letters and Numerals41
2.10Fractions
2.11Spacing of Letters and Words
2.12Lettering for Titles
2.13Drawing Pencils
2.14Templates
2.15CAD Tools
2.16Sketching and Drawing Media
2.17Standard Sheets
2.18Standard Layout Elements
2.19Layouts
2.20Planning Your Drawing or Sketch
Chapter Three Visualization and Sketching
Understanding Solid Objects
Understanding Sketching Techniques
3.1Technique of Lines
3.2Sketching Straight Lines
3.3Sketching Circles, Arcs, and Ellipses
3.4Maintaining Proportions
3.5One-View Drawings
3.6Pictorial Sketching
3.7Projection Methods
3.8Axonometric Projection
3.9Isometric Projection
3.10Isometric Drawing
3.11Making an Isometric Drawing
3.12Offset Location Measurements
Isometric Drawings of Inclined Surfaces
3.13Hidden Lines and Centerlines
3.14Angles in Isometric
3.15Irregular Objects
3.16Curves in Isometric
3.17True Ellipses in Isometric
3.18Orienting Ellipses in Isometric Drawings
3.19Drawing Isometric Cylinders
3.20Screw Threads in Isometric
3.21Arcs in Isometric
3.22Spheres in Isometric
3.23Oblique Sketches
3.24Length of Receding Lines
3.25Choice of Position in Oblique Drawings
3.26Ellipses for Oblique Drawings1
3.27Angles in Oblique Projection
3.28Sketching Assemblies
3.29Sketching Perspectives
3.30Curves and Circles in Perspective
3.31Shading
3.32Computer Graphics
3.33Drawing on Drawing
Chapter Four Geometry for Modeling and Design
Coordinates for 3D CAD Modeling
Geometric Entities130
4.1Manually Bisecting a Line or Circular Arc
4.2Drawing Tangents to Two Circles
4.3Drawing an Arc Tangent to a Line or Arc and Through a Point
4.4Bisecting an Angle
4.5Drawing a Line Through a Point and Parallel to a Line
4.6Drawing a Triangle With Sides Given
4.7Drawing a Right Triangle With Hypotenuse and One Side Given
4.8Laying Out an Angle
4.9Drawing an Equilateral Triangle
4.10Polygons
4.11Drawing a Regular Pentagon
4.12Drawing a Hexagon
4.13Ellipses
4.14Spline Curves
4.15Geometric Relationships
4.16Solid Primitives
4.17Recognizing Symmetry
4.18Extruded Forms
4.19Revolved Forms
4.20Irregular Surfaces
4.21User Coordinate Systems
4.22Transformations
Chapter Five Modeling and Design
Refinement and Modeling
Kinds of Models
5.12D Models
5.23D Models
5.3Types of 3D Models
5.4Constraint-Based Modeling
5.5Constraints Define the Geometry
5.6Planning Parts for Design Flexibility
5.7Sketch Constraints
5.8The Base Feature
5.9Editing the Model
5.10Constraint-Based Modeling Modes
5.11Choosing the Right Modeling Method
Chapter Six Orthographic Projection
Understanding Projections
6.1Hidden Line Technique
6.2Precedence of Lines
6.3Centerlines
6.4Laying Out a Drawing
6.5Developing Views from 3D Models
6.6Visualization
6.7Views of Surfaces
6.8Normal Surfaces
6.9Inclined Surfaces
6.10Oblique Surfaces
6.11Edges
6.12Normal Edges
6.13Inclined Edges
6.14Oblique Edges
6.15Parallel Edges
6.16Angles
6.17Vertices
6.18Interpreting Points
6.19Interpreting Lines
6.20Similar Shapes of Surfaces
6.21Interpreting Views
6.22Models
6.23Projecting a Third View
6.24Becoming a 3D Visualizer
Chapter Seven 2D Drawing Representation
Practices for 2D Documentation Drawings
7.1Visualizing and Drawing Complex Cylindrical Shapes
7.2Cylinders When Sliced
7.3Cylinders and Ellipses
7.4Intersections and Tangencies
7.5Fillets and Rounds
7.6Runouts
7.7Conventional Edges
7.8Necessary Views
7.9Partial Views
7.10Alignment of Views
7.11Removed Views
7.12Right-Hand and Left-Hand Parts
7.13Revolution Conventions
Chapter Eight Section Views
Understanding Sections
8.1Placement of Section Views
8.2Labeling Cutting Planes
8.3Line Precedence
8.4Rules for Lines in Section Views
8.5Cutting-Plane Line Style
8.6Section-Lining Technique
8.7Half Sections
8.8Broken Out Sections
8.9Revolved Sections
8.10Removed Sections
8.11Offset Sections
8.12Ribs in Section
8.13Aligned Sections
8.14Partial Views
8.15Intersections in Sections
8.16Conventional Breaks and Sections
8.17Assembly Sections
Chapter Nine Auxiliary Views
Understanding Auxiliary Views
9.1Using Triangles to Sketch Auxiliary Views
9.2Using Grid Paper to Sketch Auxiliary Views
9.3Using CAD to Create Auxiliary Views
9.4Circles and Ellipses in Auxiliary Views
9.5Hidden Lines in Auxiliary Views
9.6Partial Auxiliary Views
9.7Half Auxiliary Views
9.8Reverse Construction
9.9Auxiliary Sections
9.10Viewing-Plane Lines and Arrows
9.11Uses of Auxiliary Views
9.12True Length of a Line
9.13Point View of a Line
9.14Edge View of a Plane
9.15True Size of an Oblique Surface of an Oblique Surface
9.16Dihedral Angles
Understanding Developments and Intersections
9.17Developments
9.18Hems and Joints for Sheet Metal and Other Materials
9.19More Examples of Developments and Intersections
9.20Transition Pieces
9.21Triangulation
9.22Developing a Transition Piece Connecting Rectangular Pipes on the Same Axis
9.23Developing a Plane and a Sphere
9.24Revolution
9.25Primary and Successive Revolutions
9.26True Length of a Line: Revolution Method
Chapter Ten Modeling for Manufacture and Assembly
Design for Manufacture, Assembly, Disassembly, and Service
10.1Assembly Models
10.2Assemblies and Design
10.3Assemblies and Simulation
10.4Parts for Assemblies
10.5Using Your Model to Check Fits
10.6Manufacturing Processes
10.7Dos and Don’ts of Practical Design
10.8Manufacturing Materials
10.9Appearance, Service Life, and Recycling
10.10Dimensional Accuracy and Surface Finish
10.11Net-Shape Manufacturing
10.12Computer-Integrated Manufacturing
10.13Shared Manufacturing
10.14Manufacturing Methods and the Drawing
10.15Modeling for Testing and Refinement
10.16Determining Mass Properties
10.17Exporting Data from the Database
10.18Downstream Applications
10.19Prototyping Your Design
Chapter Eleven Dimensioning
Understanding Dimensioning
11.1Lines Used in Dimensioning
11.2Using Dimension and Extension Lines
11.3Arrowheads
11.4Leaders
11.5Drawing Scale and Dimensioning
11.6Direction of Dimension Values and Notes
11.7Dimension Units
11.8Millimeter Values
11.9Decimal-Inch Values
11.10Rules for Dimension Values
11.11Rules for Rounding Decimal Dimension Values
11.12Dual Dimensioning
11.13Combination Units
11.14Dimensioning Symbols
11.15Placing and Showing Dimensions Legibly
11.16Superfluous Dimensions
11.17Dimensioning Angles
11.18Dimensioning Arcs
11.19Fillets and Rounds
11.20Size Dimensioning: Prisms
11.21Size Dimensioning: Cylinders
11.22Size Dimensioning: Holes
11.23Applying Standard Dimensioning Symbols
11.24Dimensioning Counterbores and Spotfaces with Fillets
11.25Dimensioning Triangular Prisms, Pyramids, and Cones
11.26Dimensioning Curves
11.27Dimensioning Curved Surfaces
11.28Dimensioning Rounded-End Shapes
11.29Dimensioning Threads
11.30Dimensioning Tapers
11.31Dimensioning Chamfers
11.32Shaft Centers
11.33Dimensioning Keyways
11.34Dimensioning Knurls
11.35Finish Marks
11.36Surface Roughness
11.37Location Dimensions
11.38Mating Dimensions
11.39Coordinate Dimensioning
11.40Tabular Dimensions
11.41Dimensioning for Numerically-Controlled Machining
11.42Machine, Pattern, and Forging Dimensions
11.43Sheet Metal Bends
11.44Notes
11.45Standards
11.46Dos and Don’ts of Dimensioning
Chapter Twelve Tolerancing
Understanding Tolerance
12.1Specifying Tolerances
12.2General Tolerance Notes
12.3Limit Tolerances
Single-Limit Dimensioning
12.4Plus-or-Minus Tolerances
12.5Tolerance Stacking
12.6Using American National Standard Limits and Fit Tables
12.7Tolerances and Machining Processes
12.8Metric System of Tolerances and Fits
12.9Preferred Sizes
12.10Preferred Fits
12.11Geometric Dimensioning and Tolerancing
12.12Symbols for Tolerances of Position and Form
12.13Datum Features
12.14Positional Tolerances
12.15Maximum Material Condition
12.16Tolerances of Angles
12.17Form Tolerances for Single Features
12.18Orientations for Related Features
12.19Using Geometric Dimensioning and Tolerancing
12.20Tolerances and Digital Product Definition
12.21Computer Graphics
Chapter Thirteen Threads, Fasteners, and Springs
Understanding Threads and Fasteners
13.1Thread Notes
13.2External Thread Symbols606
13.3Internal Thread Symbols606
13.4Detailed Representation: Metric, Unified, and American National Threads
13.5Threads in Assembly
13.6Modeling Thread
13.7American National Standard Pipe Threads
13.8Use of Phantom Lines
13.9Tapped Holes
13.10Bolts, Studs, and Screws
13.11Standard Bolts and Nuts
13.12Drawing Standard Bolts
13.13Specifications for Bolts and Nuts
13.14Locknuts and Locking Devices
13.15Standard Cap Screws
13.16Standard Machine Screws
13.17Standard Set Screws
13.18American National Standard Wood Screws
13.19Miscellaneous Fasteners
13.20Keys
13.21Machine Pins
13.22Rivets
13.23Springs625
13.24Drawing Helical Springs
13.25Modeling Springs
Chapter Fourteen Working Drawings
Working Drawings or Construction Drawings
14.1Subassemblies
14.2Identification
14.3Parts Lists
14.4Assembly Sections
14.5Working Drawing Assembly
14.6Installation Assemblies
14.7Check Assemblies
14.8Working Drawing Formats
14.9Drawing Numbers
14.10Zoning
14.11Checking Drawings
14.12Drawing Revisions
14.13Simplifying Drawings
14.14Patent Drawings
Chapter Fifteen Drawing Control and Data Management
Documentation and the Design Database
15.1Requirements for Engineering Documentation
15.2Drawing Control Methods
15.3Good Practices for Electronic Drawing Storage
15.4Drawing Standards
15.5Permission and Ownership
15.6Backing Up Drawing Files
15.7Storage Media
15.8Using the 3D Design Database in Concurrent Engineering
15.9Quality Management
15.10Product Data Management
15.11Managing Work Flow
15.12Data Management and the Web
Chapter Sixteen Gears and Cams
Understanding Gears
16.1Constructing a Base Circle
16.2The Involute Tooth Shape
16.3Approximate Involute Using Circular Arcs
16.4Spacing Gear Teeth
16.5Rack Teeth
16.6Working Drawings of Spur Gears
16.7Spur Gear Design
16.8Worm Gears
16.9Working Drawings of Worm Gears
16.10Bevel Gears
16.11Bevel Gear Definitions and Formulas
16.12Working Drawings of Bevel Gears
16.13Cams
16.14Displacement Diagrams
16.15Cam Profiles
16.16Offset and Pivoted Cam Followers
16.17Cylindrical Cams
16.18Other Drive Devices
Chapter Seventeen Electronic Diagrams
Understanding Electronic Diagrams
17.1Drawing Size, Format, and Title
17.2Line Conventions and Lettering
17.3Standard Symbols for Electronic Diagrams
17.4Abbreviations
17.5Grouping Parts
17.6Arrangement of Electrical/Electronic Symbols
17.7Connections and Crossovers
17.8Interrupted Paths
17.9Terminals
17.10Color Coding
17.11Division of Parts
17.12Electron Tube Pin Identification
17.13Reference Designations
17.14Numerical Values
17.15Functional Identification and Other Information
17.16Integrated Circuits
17.17Printed Circuits
17.18Computer Graphics
Chapter Eighteen Structural Drawing
Structural Drawings
18.1Wood Construction
18.2Structural Steel
18.3Structural Steel Shapes
18.4Specifications
18.5Welded and Bolted Connections
18.6Riveted Connections
18.7Frame Beam Connections
18.8Welding
18.9High-Strength Bolting for Structural Joints
18.10Accuracy of Dimensions
18.11Concrete Construction
18.12Reinforced Concrete Drawings
18.13Structural Clay Products
18.14Stone Construction
Chapter Nineteen Landform Drawings
Understanding Landform Drawings
19.1Symbols
19.2Bearings
19.3Elevation
19.4Contours
19.5City Maps
19.6Structure Location Plans
19.7Highway Plans
Chapter Twenty Piping Drawings
Understanding Piping Drawings
20.1Steel and Wrought Iron Pipe
20.2Cast Iron Pipe
20.3Seamless Brass and Copper Pipe
20.4Copper Tubing
20.5Plastic and Specialty Pipes
20.6Pipe Fittings
20.7Pipe Joints
20.8Valves
20.9American National Standard Code for Pressure Piping
Chapter Twenty-One
Welding Representation
Understanding Weldment Drawings
Understanding a Welding Symbol
21.1Types of Welded Joints
21.2Types of Welds
21.3Welding Symbols
21.4Fillet Welds
21.5Groove Welds
21.6Back or Backing Welds
21.7Surface Welds
21.8Plug and Slot Welds
21.9Spot Welds
21.10Seam Welds
21.11Projection Welds
21.12Flash and Upset Welds
21.13Welding Applications
21.14Welding Templates
21.15Computer Graphics
CHAPTER Twenty-Two
Axonometric Projection
Understanding Axonometric Projection
22.1Dimetric Projection
22.2Approximate Dimetric Drawings
22.3Trimetric Projection
22.4Trimetric Scales
22.5Trimetric Ellipses
22.6Axonometric Projection Using Intersections
22.7Computer Graphics
22.8Oblique Projections
22.9Ellipses for Oblique Drawings
22.10Offset Measurements
22.11Oblique Dimensioning
22.12Computer Graphics
CHAPTER Twenty-Three Perspective Drawings
Understanding Perspectives
23.1Perspective from a Multiview Projection
23.2Nonrotated Side View Method for Perspective
23.3Drawing an Angular Perspective
23.4Position of the Station Point
23.5Location of the Picture Plane
23.6Bird’s-Eye View or Worm’s-Eye View
23.7The Three Types of Perspectives
23.8One-Point Perspective
23.9One-Point Perspective of a Cylindrical Shape
23.10Two-Point Perspective
23.11Three-Point Perspective
23.12Measurements in Perspective
23.13Direct Measurements along Inclined Lines
23.14Vanishing Points of Inclined Lines
23.15Inclined Lines in Perspective, Joining Endpoint Method
23.16Curves and Circles in Perspective
23.17The Perspective Plan Method
23.18Perspective Diagram
23.19Shading
23.20Computer Graphics
| Erscheinungsdatum | 06.08.2016 |
|---|---|
| Verlagsort | Berkeley |
| Sprache | englisch |
| Themenwelt | Informatik ► Weitere Themen ► CAD-Programme |
| Technik ► Maschinenbau | |
| ISBN-10 | 0-13-430641-4 / 0134306414 |
| ISBN-13 | 978-0-13-430641-4 / 9780134306414 |
| Zustand | Neuware |
| Informationen gemäß Produktsicherheitsverordnung (GPSR) | |
| Haben Sie eine Frage zum Produkt? |
aus dem Bereich


