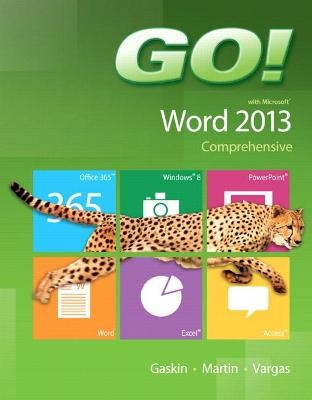
GO! with Microsoft Word 2013 Comprehensive
Pearson (Verlag)
978-0-13-341746-3 (ISBN)
The primary goal of the GO! Series, aside from teaching computer applications, is ease of implementation, with an approach that is based on clearly defined projects.
Teaching and Learning Experience
This program will provide a better teaching and learning experience–for you and your students. Here’s how:
Personalize Learning: MyITLab delivers proven results in helping students succeed, provides engaging experiences that personalize learning, and comes from a trusted partner with educational expertise and a deep commitment to helping students and instructors achieve their goals.
Engage Students with a Project-Based Approach: GO!’s project-based approach teaches students to solve real problems as they practice and learn the features.
Motivate Students with Clear Instruction: Based on professor and student feedback, this text has been designed to offer clear instruction for full student comprehension.
Teach the Course You Want in Less Time: The GO! series’ one-of-a kind instructional system provides you with everything you need to prepare for class, teach the material, and assess your students.
Table of Contents
Chapter 1: Creating Documents with Microsoft Word 2013
Project 1A: Flyer
Objective 1 Create a New Document and Insert Text
Activity 1.01 Starting a New Word Document
Activity 1.02 Inserting Text from Another Document
Objective 2 Insert and Format Graphics
Activity 1.03 Formatting Text by Using Text Effects
Activity 1.04 Inserting Pictures
Activity 1.05 Resizing Pictures and Using Live Layout
Activity 1.06 Wrapping Text Around a Picture by Using Layout Options
Activity 1.07 Moving a Picture
Activity 1.08 Applying Picture Styles
Activity 1.09 Applying Artistic Effects
Activity 1.10 Adding a Page Border
Objective 3 Insert and Modify Text Boxes and Shapes
Activity 1.11 Inserting, Sizing, and Positioning a Shape
Activity 1.12 Typing Text in a Shape, Increasing Font Size, and Formatting a Shape
Activity 1.13 Inserting a Text Box
Activity 1.14 Sizing and Positioning a Text Box and Formatting a Text Box by Using Shape Styles
Objective 4 Preview and Print a Document
Activity 1.15 Adding a File Name to the Footer
Activity 1.16 Adding Document Properties and Previewing and Printing a Document
Web Apps 1A: Create a Flyer in Word Web App
Project 1B: Information Handout
Objective 5 Change Document and Paragraph Layout
Activity 1.17 Setting Margins
Activity 1.18 Aligning Text
Activity 1.19 Changing Line Spacing
Activity 1.20 Indenting Text
Activity 1.21 Adding Space Before and After Paragraphs
Objective 6 Create and Modify Lists
Activity 1.22 Creating a Bulleted List
Activity 1.23 Creating a Numbered List
Activity 1.24 Customizing Bullets
Objective 7 Set and Modify Tab Stops
Activity 1.25 Setting Tab Stops
Activity 1.26 Modifying Tab Stops
Objective 8 Insert a SmartArt Graphic and an Online Video
Activity 1.27 Inserting a SmartArt Graphic
Activity 1.28 Sizing and Formatting a SmartArt Graphic
Activity 1.29 Inserting an Online Video
Web Apps 1B: Create a Handout in the Word Web App
Chapter 2: Using Tables and Templates to Create Resumes and Cover Letters
Project 2A: Resume
Objective 1 Create a Table
Activity 2.01 Creating a Table
Activity 2.02 Adding Text to a Table
Activity 2.03 Inserting Existing Text into a Table Cell
Activity 2.04 Creating Bulleted Lists in a Table
Objective 2 Format a Table
Activity 2.05 Changing the Width of Table Columns
Activity 2.06 Adding Rows to a Table
Activity 2.07 Merging Table Cells
Activity 2.08 Formatting Text in Cells
Objective 3 Modify Table Layout
Activity 2.09 Changing Table Borders
Web Apps 2A: Edit a Resume in Word Web App
Project 2B: Cover Letter and Templates
Objective 4 Create a New Document from an Existing Document
Activity 2.10 Creating a Letterhead Template
Activity 2.11 Creating a Document from an Existing Document
Objective 5 Change and Reorganize Text
Activity 2.12 Recording AutoCorrect Entries
Activity 2.13 Creating a Cover Letter and Inserting the Current Date
Activity 2.14 Finding and Replacing Text
Activity 2.15 Selecting and Moving Text to a New Location
Activity 2.16 Inserting a Table in a Document
Activity 2.17 Applying a Table Style
Objective 6 Use the Proofing Options
Activity 2.18 Checking Spelling and Grammar Errors
Activity 2.19 Using the Thesaurus
Objective 7 Create a Fax Cover Sheet by Using a Template
Activity 2.20 Locating and Opening a Template
Activity 2.21 Replacing Template Placeholder Text
Activity 2.22 Addressing and Printing and Envelope
Web Apps 2B: Create a Cover Letter in Word Web App
Chapter 3: Creating Research Papers, Newsletters, and Merged Mailing Labels
Project 3A: Research Paper
Objective 1 Create a Research Paper
Activity 3.01 Formatting Text and Page Numbers in a Research Paper
Activity 3.02 Using PDF Reflow for a Research Paper
Activity 3.03 Inserting a Symbol
Activity 3.04 Adding the File Name and the Current Date to the Footer
Objective 2 Insert Footnotes in a Research Paper
Activity 3.05 Inserting Footnotes
Activity 3.06 Modifying a Footnote Style
Objective 3 Create Citations and a Bibliography in a Research Paper
Activity 3.07 Creating Citations for a Book
Activity 3.08 Creating Citations for a Website
Activity 3.09 Inserting Page Breaks
Activity 3.10 Creating a Reference Page
Activity 3.11 Modifying a Source by Using Source Manager
Activity 3.12 Managing Document Properties
Objective 4 Use Read Mode
Activity 3.13 Using Read Mode to Scroll Page by Page
Activity 3.14 Using Read Mode to Go to a Page
Web Apps 3A: Create a Research Paper in Word Web App
Project 3B: Newsletter with Mailing Labels
Objective 5 Format a MultipleColumn Newsletter
Activity 3.15 Changing One Column of Text to Two Columns
Activity 3.16 Formatting Multiple Columns
Activity 3.17 Inserting a Column Break
Activity 3.18 Inserting and Formatting Images
Activity 3.19 Inserting a Screenshot
Activity 3.20 Scaling and Rotating an Image
Activity 3.21 Recoloring an Image
Activity 3.22 Setting Transparent Color
Activity 3.23 Adjusting Brightness and Contrast
Activity 3.24 Applying a Border to an Image
Objective 6 Use Special Character and Paragraph Formatting
Activity 3.25 Applying the Small Caps Font Effect
Activity 3.26 Adding a Border and Shading to a Paragraph
Objective 7 Create Mailing Labels Using Mail Merge
Activity 3.27 Opening the Mail Merge Wizard Template
Activity 3.28 Completing the Mail Merge Wizard
Activity 3.29 Previewing and Printing the Mail Merge Document
Web Apps 3B: Create a Newsletter in Word Web App
Chapter 4: Using Styles and Creating Multilevel Lists and Charts
Project 4A Customer Handout
Objective 1 Apply and Modify Styles
Activity 4.01 Applying Styles to Text
Activity 4.02 — Modifying Existing Style Attributes
Activity 4.03 — Changing the Document Theme
Objective 2 — Create New Styles
Activity 4.04 — Creating Custom Styles and Assigning Shortcut Keys
Objective 3 Manage Styles
Activity 4.05 — Customizing Settings for Existing Styles
Activity 4.06 — Viewing Style Formats
Activity 4.07 — Clearing Existing Formats
Activity 4.08 — Removing a Style
Objective 4 Create a Multilevel List
Activity 4.09 — Creating a Multilevel List with Bullets and Modifying List Indentation
Activity 4.10 - Modifying the Numbering and Formatting in a Multilevel List Style
Activity 4.11 —Applying the Current List Style and Changing the List Levels
Project 4B — Planning Memo with a Chart
Objective 5 Change the Style Set of a Document and Apply a Template
Activity 4.12 — Formatting a Memo
Activity 4.13 — Changing the Style Set of a Document
Activity 4.14 — Changing the Paragraph Spacing of a Document
Activity 4.15 — Attaching a Template to a Document
Objective 6 Insert a Chart and Enter Data into a Chart
Activity 4.16 — Selecting a Chart Type
Activity 4.17 — Entering Chart Data
Activity 4.18 — Editing Data
Objective 7 Change a Chart Type
Activity 4.19 — Changing the Chart Type
Activity 4.20 — Adding Chart Elements
Objective 8 Format a Chart and Save a Chart as a Template
Activity 4.21 — Changing the Chart Style and Formatting Chart Elements
Activity 4.22 — Resizing and Positioning a Chart
Activity 4.23 — Saving a Chart as a Template
Chapter 5: Using Advanced Table Features
Project 5A Product Summary
Objective 1 Create and Apply a Custom Table Style
Activity 5.01 — Using the Organizer to Manage Styles
Activity 5.02 - Creating a Table Style and Splitting a Table
Activity 5.03 — Applying and Modifying a Table Style
Objective 2 Format Cells
Activity 5.04 — Merging and Splitting Cells
Activity 5.05 — Positioning Text within Cells
Objective 3 Use Advanced Table Features
Activity 5.06 — Sorting Tables by Category
Activity 5.07 — Converting Text to a Table and Modifying Fonts within a Table
Activity 5.08 — Defining the Dimensions of a Table and Setting AutoFit Options
Activity 5.09 — Using Formulas in Tables and Creating Custom Field Formats
Activity 5.10 — Updating Formula Fields in Tables
Activity 5.11 - Adding Captions, Excluding Labels from Captions, and Setting Caption Positions
Objective 4 Modify Table Properties
Activity 5.12 — Wrapping Text around Tables and Changing Caption Formats
Project 5B — Expense Form
Objective 5 — Draw a Freeform Table
Activity 5.13 — Drawing a Freeform Table
Activity 5.14 — Adding and Removing Columns and Rows
Activity 5.15 — Inserting Text and Graphics
Activity 5.16 — Changing Text Direction
Activity 5.17 — Distributing Rows and Columns
Activity 5.18 — Formatting a Table
Objective 6 — Use Nested Tables
Activity 5.19 — Changing Cell Margins and Cell Spacing and Using the Border Painter
Activity 5.20 — Inserting a Nested Table and Setting a Table Title by Adding Alternative Text
Objective 7 — Insert an Excel Spreadsheet
Activity 5.21 — Inserting an Excel Spreadsheet
Activity 5.22 — Modifying the Dimensions of a Table
Chapter 6: Building Documents from Reusable Content and Using Markup Tools
Project 6A Newsletter with Reusable Content and Custom Theme
Objective 1 — Create Custom Building Blocks
Activity 6.01 — Inserting a Text Box and Creating a Custom Building Block
Activity 6.02 — Using the Building Blocks Organizer to View, Edit, and Move Building Blocks
Activity 6.03 — Saving a Custom Building Block as a Quick Table
Activity 6.04 — Saving a Picture and an AutoText Entry as Quick Parts
Objective 2 — Create and Save a Theme Template
Activity 6.05 —Creating Custom Theme Colors and Theme Fonts
Activity 6.06 —Creating a Custom Theme Template
Objective 3 — Create a Document by Using Building Blocks
Activity 6.07 — Formatting Text in Columns
Activity 6.08 — Inserting Quick Parts, Customizing Building Blocks, and Manually Hyphenating a Document
Activity 6.09 —Deleting Custom Building Blocks, Theme Colors, and Theme Fonts
Project 6B — Events Schedule with Tracked Changes
Objective 4 — Use Comments in a Document
Activity 6.10 — Inserting Comments
Activity 6.11 — Editing and Deleting Comments
Objective 5 — Track Changes in a Document
Activity 6.12 — Viewing All Changes in a Document
Activity 6.13 — Setting Tracking and Markup Options
Activity 6.14 — Using the Reviewing Pane
Activity 6.15 — Tracking Changes and Locking Tracking to Restrict Editing
Activity 6.16 — Accepting or Rejecting Changes in a Document
Objective 6 — View Side by Side, Compare, and Combine Documents
Activity 6.17 — Using View Side by Side
Activity 6.18 — Combining Documents and Resolving MultiDocument Style Conflicts
Activity 6.19 — Restoring Default SeÀ«ngs
Chapter 7: Creating Web Content and Using Advanced Editing Options
Project 7A Company Webpage
Objective 1 — Create a Webpage from a Word Document
Activity 7.01 — Saving a Document as a Webpage and Changing Document Views
Activity 7.02 — Applying Background Color
Activity 7.03 — Inserting a Drop Cap
Activity 7.04 — Sorting Paragraphs
Activity 7.05 — Inserting a Horizontal Line
Objective 2 — Insert and Modify Hyperlinks in a Word Document
Activity 7.06 — Inserting a Hyperlink
Activity 7.07 — Inserting a Hyperlink That Opens a New Email Message
Activity 7.08 — Editing a PDF File in Word and Creating a Webpage for an Internal Link
Activity 7.09 — Testing Webpages in a Browser
Activity 7.10 — Editing and Removing Hyperlinks
Activity 7.11 — Configuring Language Options in Documents
Objective 3 — Create a Blog Post
Activity 7.12 — Creating a Blog Post from a Template
Activity 7.13 — Inserting Hyperlinks in a Blog Post
Project 7B — FAQ List
Objective 4 — Manage Document Versions
Activity 7.14 — Changing the AutoSave Frequency
Activity 7.15 — Zooming from the VIEW tab
Activity 7.16 — Managing Document Versions
Objective 5 — Collect and Paste Images and Text
Activity 7.17 — Collecting Images and Text from Multiple Documents
Activity 7.18 — Pasting Information from the Clipboard Pane
Objective 6 — Locate Supporting Information and Insert Equations
Activity 7.19 — Using the Research Pane to Locate Information
Activity 7.20 — Inserting Special Characters and Using the Thesaurus
Activity 7.21 — Translating Text from the Research Task Pane
Activity 7.22 — Inserting Equations
Objective 7 — Use Advanced Find and Replace Options
Activity 7.23 — Using Find and Replace to Change Text Formatting
Activity 7.24 — Using Wildcards to Find and Replace Text
Activity 7.25 — Checking Spelling and Grammar in a Document
Objective 8 — Save in Other File Formats
Activity 7.26 — Saving a Document in RTF Format
Chapter 8: Creating Mass Mailings
Project 8A Customer Letters
Objective 1 — Merge a Data Source and a Main Document
Activity 8.01 — Using an Excel Spreadsheet as a Data Source
Activity 8.02 — Using the MAILINGS Tab Commands to Begin Mail Merge
Activity 8.03 — Filtering Records and Creating a Character Style
Activity 8.04 — Inserting Merge Fields
Activity 8.05 — Previewing Results and Validating Merged Data
Activity 8.06 — Merging to a New Document
Objective 2 — Use Mail Merge to Create Envelopes
Activity 8.07 — Creating Envelopes
Project 8B — Cruise Postcards
Objective 3 — Edit and Sort a Data Source
Activity 8.08 — Managing a Recipient List by Editing a Data Source
Activity 8.09 — Sorting a Recipient List
Activity 8.10 Using Nested Tables and Formatting the Main Document
Objective 4 — Match Fields and Apply Rules
Activity 8.11 — Matching Fields to a Data Source
Activity 8.12 — Applying Rules to a Merge
Objective 5 — Create a Data Source and a Directory
Activity 8.13 — Creating a Data Source
Activity 8.14 — Creating the Main Document
Activity 8.15 — Merging Files to Create a Directory
Activity 8.16 — Editing a Directory
Activity 8.17 — Inserting a Watermark
Chapter 9: Creating Standardized Forms and Managing Documents
Project 9A Survey Form
Objective 1 — Create a Customized Form
Activity 9.01 — Saving the Form as a Template
Activity 9.02 — Displaying the DEVELOPER Tab
Activity 9.03 — Inserting a Plain Text Content Control
Activity 9.04 — Inserting a Date Picker Content Control
Activity 9.05 — Inserting a DropDown List Content Control
Activity 9.06 — Inserting a Combo Box Content Control
Activity 9.07 — Inserting and Modifying a Check Box Form Field
Activity 9.08 — Converting Text to a Table
Activity 9.09 — Inserting a Check Box Content Control
Objective 2 — Modify and Lock a Form
Activity 9.10 — Editing Text in a Content Control
Activity 9.11 Modifying Content Control Properties
Activity 9.12 — Using a Password to Protect a Document
Objective 3 — Use a Template to Complete a Form
Activity 9.13 Filling in the Form
Activity 9.14 — Unlocking a Form
Project 9B — Moving Agreement
Objective 4 — Customize the Ribbon
Activity 9.15 — Creating a Custom Tab
Activity 9.16 — Adding Commands to a Tab
Objective 5 — Format Pictures and Text Boxes
Activity 9.17 — Removing the Background and Correcting Colors in a Picture
Activity 9.18 — Cropping, Rotating, and Aligning Pictures
Activity 9.19 — Stacking and Grouping Objects and Converting Text to WordArt
Objective 6 — Add a Digital Signature to a Document
Activity 9.20 — Converting a Table to Text
Activity 9.21 — Adding a Signature Line to a Document
Objective 7 — Prepare a Document for Distribution
Activity 9.22 — Inspecting a Document and Removing Document Metadata
Activity 9.23 — Marking a Document as Final
Activity 9.24 — Maintaining Backward Compatibility
Chapter 10: Working with Long Documents
Project 10A Autumn Schedule
Objective 1 — Create a Master Document and Subdocuments
Activity 10.01 — Creating a Master Document from an Existing Document
Activity 10.02 — Collapsing and Rearranging Subdocuments
Activity 10.03 — Inserting an Existing File as a Subdocument
Objective 2 — Manage a Master Document and Subdocuments
Activity 10.04 — Editing a Master Document and Subdocuments
Objective 3 — Navigate and Inspect the Master Document
Activity 10.05 — Using the Navigation Pane to View a Document
Activity 10.06 — Creating Bookmarks
Activity 10.07 — Creating CrossReferences
Activity 10.08 — Reviewing Word Count and Readability Statistics
Activity 10.09 — Finalizing a Master Document
Objective 4 — Create and Modify Headers and Footers
Activity 10.10 — Inserting Odd and Even Page Breaks
Activity 10.11 — Inserting a Cover Page
Activity 10.12 — Creating Documents for Use with Accessibility Tools
Project 10B — Reference Guide
Objective 5 — Create an Index
Activity 10.13 — Formatting the Document
Activity 10.14 — Marking Index Entries and Using an AutoMark File
Activity 10.15 — Inserting an Index
Activity 10.16 — Updating an Index
Objective 6 — Create a Table of Contents
Activity 10.17 — Assigning Heading Levels
Activity 10.18 —Creating and Formatting a Table of Contents
Objective 7 — Create a Table of Figures
Activity 10.19 — Creating a Table of Figures
Objective 8 — Control the Flow and Formatting of Pages and Text
Activity 10.20 — Hiding White Space and Applying Hyphenation
Activity 10.21 — Keeping Paragraphs Together on a Page
Activity 10.22 — Changing Page Settings, Splitting the Window, and Modifying Page Numbers
Activity 10.23 — Configuring Documents to Print, Printing Sections, and Setting Print Scaling
Chapter 11: Embedding and Linking Objects and Using Macros
Project 11A Survey Memo
Objective 1 — Embed Objects in a Word Document
Activity 11.01 — Using Paste Special to Embed an Excel Chart
Activity 11.02 — Using Paste Special to Embed an Access Table
Activity 11.03 — Embedding a PowerPoint File
Objective 2 — Link Objects to a Word Document
Activity 11.04 — Linking to an Excel File
Activity 11.05 — Linking to Another Word Document
Project 11B — Fair Flyer
Objective 3 — Create Macros
Activity 11.06 — Saving a MacroEnabled Document
Activity 11.07 — Changing Macro Security Settings
Activity 11.08 — Recording a KeyboardActivated Macro
Activity 11.09 — Recording a ButtonActivated Macro
Activity 11.10 - Creating a Macro That Runs Automatically
Objective 4 — Use Macros
Activity 11.11 — Running a Macro
Activity 11.12 — Editing a Macro in the Visual Basic Editor
Activity 11.13 — Using a Builtin Word Macro
Objective 5 — Write a Procedure in VBA
Activity 11.14 — Writing a Procedure in VBA to Apply Quotation Marks
Activity 11.15 — Creating Screen Captures
Activity 11.16 — Copying a Macro from One Document to Another Document
Activity 11.17 — Restoring Default Settings
Chapter 12 Integrating Word with PowerPoint and Modifying Document Components
Project 12A Planning Presentation
Objective 1 – Integrate Word with PowerPoint
Activity 12.01 – Creating an Outline in Outline View
Activity 12.02 – Collapsing and Expanding Outline Levels
Activity 12.03 – Using a Word Outline to Create a PowerPoint
Objective 2 – Modify a PowerPoint Presentation
Activity 12.04 – Modifying a PowerPoint Presentation
Activity 12.05 – Publishing a PowerPoint Presentation in Word
Objective 3 – Create a Table of Authorities
Activity 12.06 – Creating a Table of Authorities
Activity 12.07 – Updating a Table of Authorities
Project 12B – Park Brochure
Objective 4 – Modify the Document Layout
Activity 12.08 – Changing Paper Size
Activity 12.09 – Changing Character Spacing
Activity 12.10 – Inserting Nonbreaking Hyphens and Nonbreaking Spaces
Objective 5 – Format Graphic and Text Elements
Activity 12.11 – Viewing Document Gridlines
Activity 12.12 – Linking Text Boxes
Activity 12.13 – Modifying Text Effects
Activity 12.14 – Applying Artistic Effects to Pictures
Activity 12.15 – Using a Picture as a Bullet
| Erscheint lt. Verlag | 11.10.2013 |
|---|---|
| Reihe/Serie | GO! for Office 2013 |
| Sprache | englisch |
| Maße | 240 x 275 mm |
| Gewicht | 1542 g |
| Themenwelt | Informatik ► Office Programme ► Word |
| ISBN-10 | 0-13-341746-8 / 0133417468 |
| ISBN-13 | 978-0-13-341746-3 / 9780133417463 |
| Zustand | Neuware |
| Informationen gemäß Produktsicherheitsverordnung (GPSR) | |
| Haben Sie eine Frage zum Produkt? |
aus dem Bereich


