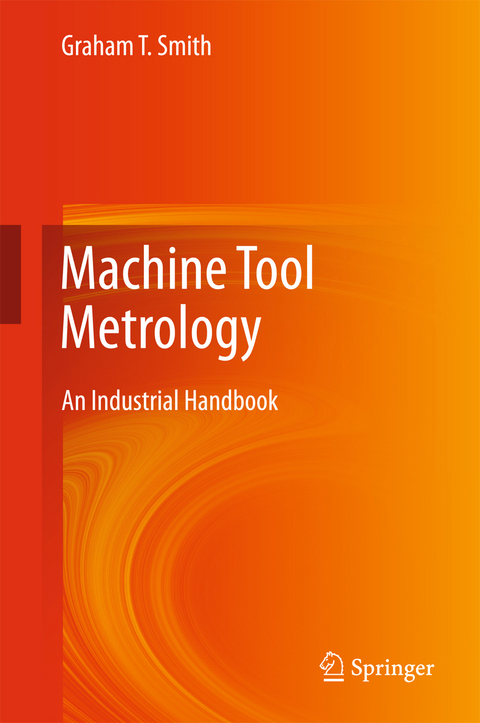
Machine Tool Metrology (eBook)
XIX, 685 Seiten
Springer International Publishing (Verlag)
978-3-319-25109-7 (ISBN)
Maximizing reader insights into the key scientific disciplines of Machine Tool Metrology, this text will prove useful for the industrial-practitioner and those interested in the operation of machine tools. Within this current level of industrial-content, this book incorporates significant usage of the existing published literature and valid information obtained from a wide-spectrum of manufacturers of plant, equipment and instrumentation before putting forward novel ideas and methodologies.
Providing easy to understand bullet points and lucid descriptions of metrological and calibration subjects, this book aids reader understanding of the topics discussed whilst adding a voluminous-amount of footnotes utilised throughout all of the chapters, which adds some additional detail to the subject.
Featuring an extensive amount of photographic-support, this book will serve as a key reference text for all those involved in the field.
Graham T. Smith is the retired Head of the Technology Research Centre which was a specialised section within Southampton Solent University. He worked as a Professor of Industrial Engineering there, and was one of the three original Founder Members of the Laser Metrology & Machine Performance International Conferences (LAMDAMAP, which has been running from 1993 to the present. Professor Smith has lectured-widely within the UK at industrial and exhibition venues, likewise across a diverse-range of university campuses in both Europe and North America, moreover he has continued to maintain close-links in the related machine tool and metrology industries. He has also previously refereed technical submissions for The Machine Tool Technologies Association (now known as the MTA) as a judge for the biennial MACH-awards and has regularly undertaken book and journal reviews, as well as periodic technical articles for the Industrial Press. Furthermore, he has also acted as an Expert Witness for many engineering/metrological litigation cases for some years and has also produced certain specific end-user products for a range of international companies, during last 50-plus years.
Publishing History 5
Preface 6
Acknowledgements 8
Contents 10
1 Measurement and Machine Tools—An Introduction 19
1.1 Why the Need for Accurate and Precise Machine Tools—a Brief History 19
1.2 The Early Historical Development of a Linear Measurements 22
1.2.1 The Historical Development of the Metre and the International Bureau of Weights and Measures (BIPM) 27
1.2.2 Optical and Laser Length Measurement 30
1.3 International Standards Laboratories—Why They Are Essential 32
1.3.1 What Is Traceability and Why Is It Necessary? 33
1.3.2 Auditing Metrology: Artefacts, Instrumentation and Equipment 37
1.3.3 National Metrological Research and Calibration Laboratories 40
1.4 Machine Tool’s Machining Capabilities 50
1.5 Metrology Equipment Utilised for Basic Machine Tool Calibration Checks 55
1.5.1 Gauge Blocks 55
1.5.2 Length Bars 59
1.5.3 Combination Angle Gauges 62
1.5.4 Precision Polygons 64
1.5.5 Dial Gauges and Dial Test Indicators 66
1.5.6 Straightedges and Cylindrical Precision Mandrels 71
1.5.7 Precision- and Cylindrical Squares 77
1.6 A Concise History of Machine Tool Calibration 80
1.7 Notable Chronology in Machine Tool Testing 85
1.8 Achievable Accuracy and Precision of Machine Tools 87
1.9 Accuracy and Precision—Produced by a Machine Tool 92
1.10 Designation of Machine Tool Axes and Kinematics 102
1.11 Configurations of Machining and Turning Centres 108
1.11.1 108
1.11.2 Modular, or Reconfigurable Machine Tools 108
1.11.3 Modular Machine Tool Construction 111
1.11.4 Turning and Machining Centre Configurations 113
1.11.5 CNC Controller Developments 119
1.11.6 Non-orthogonalParallel Kinematic Machines (PKM) 121
1.12 Major Elements in a Machine Tool’s Construction 125
1.12.1 Headstocks for Turning Centres and Spindles for Machining Centres 126
1.12.2 CNC Conventional Drive Systems and Recirculating Ballscrews 132
1.12.3 Machine Tool—Bearing Categories 144
1.12.4 Constructional Elements for Machine Tools 161
1.12.5 Linear Motor Drive Systems 172
1.12.6 Linear and Rotary Axis PositioningMonitoring Systems 177
1.13 Finite Element Analysis (FEA) of Machine Tools 195
1.13.1 FEA of CNC Machine Tools 197
1.13.2 Industrial Machine Tool Case Study in FEA—for a Machining Centre 198
1.14 Basic Construction of Coordinate Measuring Machines (CMMs) 201
1.14.1 Introduction to the CMM 201
1.14.2 CMM Construction 205
1.14.3 CMM—Mechanical Probe 206
1.14.4 Recent CMM Probing Systems 208
1.14.5 Micro-Metrology Probes 212
References 213
2 Laser Instrumentation and Calibration 219
2.1 Introduction to Lasers 219
2.1.1 Why Is Calibration so Important? 220
2.1.2 Calibration of Laser Interferometers 221
2.1.3 Laser Calibration—Potential Error and Uncertainty Sources 223
2.1.4 Introduction to Laser Machine Calibration 229
2.2 Methods of Machine Acceptance Tests—The Basis for Verification 232
2.2.1 ISO 230 Machine Tool Standards—Previous and Current Calibration Procedures 232
2.2.2 ISO 230—Laser Calibration Procedures on CNC Machine Tools 237
2.2.3 Laser Diagonal Displacement Test 240
2.2.4 Laser Step Diagonal Test 248
2.2.5 Potential Errors—In Three Axes Machine Tools 254
2.3 ISO 10360 for Coordinate Measuring Machine (CMM) Calibration and Verification 263
2.3.1 Coordinate Measuring Machine (CMM)—Fundamentals 264
2.3.2 CMM—Environmental Conditions 271
2.3.3 CMM Performance Standards 271
2.4 Calibration of a Rotary Table—With a Rotary Indexer 273
2.4.1 AxisSet™ Checkup—Utilised for Machine Tool Alignments 277
2.5 Machine Tool Linear Axes—Factors Affecting Their Accuracy and Precision 279
2.6 Laser Tracker—Instrumentation, Testing and Applications 282
2.6.1 Laser Tracker—Calibration Procedures 285
2.6.2 Laser Tracker—Frequently Asked Questions 286
2.6.3 Laser Tracker—Machine-Based Research Applications 288
References 292
3 Optical Instrumentation for Machine Calibration 296
3.1 Basic Principles of Light 296
3.1.1 Optical Alignment—Basic Principles 301
3.2 Autocollimation Principles 304
3.2.1 Basic Design of an Autocollimator 304
3.2.2 Autocollimator—its Optical Operational Principle 307
3.2.3 Digital Autocollimators 308
3.2.4 Precision Polygons for Angular Measurements 313
3.2.5 Angular Calibration of a Precision Polygon 314
3.2.6 Calibration of a Rotary Table 316
3.3 The Micro-optic Dual-Axis Autocollimator, or Angledekkor 317
3.3.1 Optical Squares and Prisms 319
3.4 Alignment Telescope–Principles of Alignment 322
3.4.1 Targets for Autocollimators 333
3.4.2 Auto-reflection and Autocollimation 334
3.4.3 Calculating Mirror Gradients 336
3.4.4 Effects of the Earth’s Curvature and Atmospheric Refraction 337
3.5 Precision Spirit Level 340
3.6 Optical Instrumentation—Clinometers 345
3.7 Talyvel—Precision Level 350
3.7.1 Software Programs—for Precision Electronic Levels 354
References 359
4 Telescoping Ballbars and Other Diagnostic Instrumentation 362
4.1 Telescoping Ballbars 362
4.1.1 Machine Tool Health Checks—The Reason Why They Are Necessary 362
4.1.2 Telescoping Ballbars—Historical Development and Operation 363
4.1.3 Telescoping Ballbar—In More Detail 371
4.1.4 Ballbar Testing—Why the Need? 371
4.1.5 Wireless Telescoping Ballbar 373
4.1.6 Telescoping Ballbar—A Closer Examination of Machine Tool Inaccuracies 376
4.1.7 Ballbars—Other Instrumental Variations 377
4.2 Grid Encoders and Linear Comparator Systems 383
4.3 Rotary Analyzer System and Calibration Rings 389
4.4 Calibration Spheres and Rings—for CMMs 392
References 395
5 Artefacts for Machine Verification 398
5.1 Introduction to Artefact Verification—For Interim CMM Checks 398
5.1.1 An Introduction to CMM Error Sources 399
5.1.2 ISO 10360 and CMM Performance 399
5.1.3 Material Standard of Size and CMM Accuracy 402
5.1.4 CMM—Length Measurement and Maximum Permissible Errors 409
5.2 Purpose-Made Artefacts—Testpieces 410
5.3 General Artefacts for CMM Verification 411
5.3.1 Step Gauge—Its Calibration 411
5.3.2 Step Gauge—For Verification of the Accuracy of CMMs 412
5.3.3 Machine Checking Gauge (MCG) 416
5.4 Ball- and Hole-Plates 423
5.4.1 The 3-D Ball-Plates 427
5.4.2 Ball- and Cube-Tetrahedrons 430
5.5 Large Reference Artefact—For Large-Scale CMM Verification 433
5.5.1 Large Reference Artefact (LRA)—Design and Construction 435
5.5.2 Large Reference Artefact—Reference Surfaces 436
5.5.3 Large Reference Artefact—Artefact Positioning, Alignment and Testing 439
5.5.4 Large Reference Artefact—Summary and Concluding Remarks 440
5.6 Machinable-Artefacts for Machine Tool Verification 441
5.6.1 Introduction to Machinable Testpiece Standards 441
5.6.2 Artefact Stereometry—For Dynamic Machine Tool and Comparative Assessment 443
5.6.3 Stereometric Artefact—Conceptual Design 444
5.6.4 Stereometric Artefact—Machining Trials 446
5.6.5 Stereometric Artefact—Machined and Metrological Results 452
5.7 Small Coordinate Measuring Machine (SCMM) 455
5.7.1 Small Coordinate Measuring Machine—Design Requirements 455
5.7.2 Small Coordinate Measuring Machine—Interferometers, Autocollimators and Probe Design 458
5.8 A Novel 3-D-Nano Touch Probe—For an Ultra-Precision CMM 460
5.8.1 Probing Force and Surface Damage 462
5.8.2 The 3-D-Nano Touch Probe—Constructional Details 462
5.9 Robotic Arms 464
5.9.1 Industrial Robotics—Their Historical Development 465
5.9.2 Defining Robotic Parameters 466
5.9.3 Robotic Calibration 468
5.9.4 Robotic Calibration Devices and Techniques 470
5.10 Parallel Kinematic Mechanism (PKM)—Equator™ Gauge 474
5.10.1 Theory of Operation—Of the PKM 476
5.10.2 Calibrating This PKM 477
5.11 Articulated Arm CMM (AACMM) 478
5.11.1 Articulated Arm CMMs—In More Detail 482
5.11.2 Verification of Articulated Arm CMM (AACMM) 484
References 485
6 Machine Tool Performance: Spindle Analysis Corrosion and Condition Monitoring
6.1 Machine Tool Spindle Analysis 489
6.1.1 Design Trends in Machine Tool Spindles 491
6.1.2 Machine Tool Spindle Failure Modes 494
6.1.3 Complete Machine Tool Retrofits and Rebuilds 501
6.2 Monitoring and Diagnostics of Machine Tool Spindles 511
6.2.1 Spindle Monitoring Instrumentation—For Machine Tools 512
6.2.2 Thermal Distortion—At the Spindle 512
6.2.3 Spindle Error Motions 513
6.3 Spindle Error Analyser (SEA) Instrumentation 514
6.3.1 Spindle Error Analyser—The Master Target and Its Fixtures—Spindle Hardware 519
6.3.2 Spindle Error Analyser—Spindle Software 520
6.3.3 SEA—Thermal Drift—Resulting from Expansion of Materials 520
6.3.4 SEA—Thermal Tests 521
6.3.5 SEA—How Spindle Measurement Data is Displayed 522
6.3.6 SEA—Spindle Error Plots: For Analysis and Rectification of Bearings 522
6.4 Corrosion—Basic Concepts 523
6.4.1 Understanding Metallic Corrosion—In Brief 526
6.4.2 Machine Tool Spalling—of Bearings and Gears 530
6.4.3 Bearing Failure Modes—With Hard Particle Lubricant Contamination 530
6.4.4 Bearing Contamination 534
6.5 Condition Monitoring—Of Machine Tools 535
6.5.1 Condition Monitoring—Historical Perspective 537
6.5.2 Types of Condition Monitoring Systems 539
6.5.3 Condition Monitoring Systems—Establishing a Programme 540
6.6 Thermographical Inspection 543
6.6.1 Electromagnetic Spectrum—A Brief and Introductory History 543
6.6.2 Thermography—Further Information 548
6.6.3 Thermal Imaging Cameras 551
6.6.4 Emissivity—Thermal Radiation 553
6.6.5 Advantages and Limitations of Thermography 554
6.6.6 Effects of Temperature Variation in Machine Tools 555
6.6.7 Controlling Component Part Temperatures 559
6.6.8 Minimising Heat Sources 559
6.6.9 Temperature Control Strategies 560
References 562
7 Uncertainty of Measurement and Statistical Process Control 566
7.1 Conformance, Traceability and Measurement Uncertainty 566
7.2 Task-Specific Measurement Uncertainty 570
7.2.1 Traceability Reporting 570
7.2.2 Conformance Rules—for Metrological Equipment 573
7.3 Measurement Uncertainty—Typically Relating to Machine Tools and CMMs 576
7.3.1 Statements of Compliance—The Effect of Uncertainty 581
7.3.2 Uncertainty Issues 581
7.3.3 Statistical Measures—In Uncertainty Calculations 582
7.3.4 Origins of Uncertainties 589
7.3.5 Calculation of Measurement Uncertainty 590
7.3.6 Analysis of Uncertainty: Uncertainty Budgets 595
7.3.7 Reducing Measurement Uncertainty 599
7.4 Statistical Process Control (SPC)—In Production Output on Machine Tools 600
7.4.1 What is Statistical Process Control? 601
7.4.2 Control Chart Functions 602
7.4.3 Control Chart—Background Information 604
7.4.4 Control Chart Limits 606
7.4.5 Reading Control Charts 609
7.4.6 Computerised SPC Charts 611
7.5 Machine and Process Capability Studies 613
7.5.1 Machine and Process Capability Studies—Typical Procedure 613
7.5.2 Machine Capability Study—In Detail 614
7.5.3 Machine Tool Capability Study—Practical Example 616
7.5.4 Final Concluding Remarks 620
References 620
Appendices 624
Appendix 1a—ISO 230 Series—Accuracy Measurement Standards (Machining Centres) 624
Appendix 1b—ISO 13041 Series—Accuracy Measurement Standards (Turning Centres) 627
Appendix 1c—ISO 10360 Series—Acceptance and Verification Tests (Co-ordinate Measuring Machines) 627
Appendix 1d—ISO 17025—General Requirements for Testing and Calibration Laboratories 628
Appendix 2—Photoelectric Scanning Techniques and Linear Digital Encoders—for Machine Displacement 629
Appendix 3a—Laser Measurement—Linear Alignment and Optical Configuration 635
Appendix 3b—Laser Measurement—Straightness Alignment and Optical Configuration 637
Appendix 3c—Laser Measurement—Squareness Alignment and Optical Configuration 639
Appendix 3d—Laser Measurement—Flatness Alignment and Optical Configuration 641
Appendix 3e—Laser Measurement—Angular Alignment and Optical Configuration 643
Appendix 3f—Laser Measurement—Rotary Alignment and Optical Configuration 645
Appendix 3g—Laser Measurement—Dynamic Analysis and Its Associated Software 647
Appendix 4i—Telescoping Ballbar—Axis Reversal Spikes—Circular Interpolating 649
Appendix 4ii—Telescoping Ballbar—Scale Mismatch—Cause and Effect 650
Appendix 4iii—Telescoping Ballbar—Backlash Step (Negative)—Cause and Effect 651
Appendix 4iv—Telescoping Ballbar—Backlash Step (Positive)—Cause and Effect 652
Appendix 4v—Telescoping Ballbar—Stick-Slip—Cause and Effect 653
Appendix 4vi—Telescoping Ballbar—Squareness—Cause and Effect 654
Appendix 4vii—Telescoping Ballbar—Servo-Mismatch—Cause and Effect 655
Appendix 4viii—Telescoping Ballbar—Cyclic Error—Cause and Effect 656
Appendix 4ix—Telescoping Ballbar—Machine Vibration—Cause and Effect 657
Appendix 4x—Telescoping Ballbar—Trouble-Shooting (Visual Guide) 659
Appendix 4xi—Telescoping Ballbar—Trouble-Shooting (Visual Guide—continued) 660
Appendix 4xii—Telescoping Ballbar—Calibration Artefact 661
Appendix 4xiii—Telescoping Ballbar—Static and Dynamic Testing 662
Appendix 4xiv—Telescoping Ballbar—Calibration on: Machining and Turning Centres 662
Appendix 5—Capability Study 664
Appendix 6a—Conversion Chart 664
Appendix 6b—Conversion Chart 665
Appendix 7—SI System of Units 667
References 673
Appendix 8—International Metrology Addresses 673
Appendix 9—International Company Addresses 680
Index 686
| Erscheint lt. Verlag | 6.4.2016 |
|---|---|
| Zusatzinfo | XIX, 685 p. 258 illus., 191 illus. in color. |
| Verlagsort | Cham |
| Sprache | englisch |
| Themenwelt | Technik ► Maschinenbau |
| Wirtschaft ► Betriebswirtschaft / Management ► Logistik / Produktion | |
| Schlagworte | Condition Monitoring • Laser and Optical Metrology • Machine Tools Calibration • Reliability-centred Maintenance (RCM) • Telescoping Ballbars • Total Productive Maintenance (TPM) |
| ISBN-10 | 3-319-25109-0 / 3319251090 |
| ISBN-13 | 978-3-319-25109-7 / 9783319251097 |
| Informationen gemäß Produktsicherheitsverordnung (GPSR) | |
| Haben Sie eine Frage zum Produkt? |
Größe: 38,5 MB
DRM: Digitales Wasserzeichen
Dieses eBook enthält ein digitales Wasserzeichen und ist damit für Sie personalisiert. Bei einer missbräuchlichen Weitergabe des eBooks an Dritte ist eine Rückverfolgung an die Quelle möglich.
Dateiformat: PDF (Portable Document Format)
Mit einem festen Seitenlayout eignet sich die PDF besonders für Fachbücher mit Spalten, Tabellen und Abbildungen. Eine PDF kann auf fast allen Geräten angezeigt werden, ist aber für kleine Displays (Smartphone, eReader) nur eingeschränkt geeignet.
Systemvoraussetzungen:
PC/Mac: Mit einem PC oder Mac können Sie dieses eBook lesen. Sie benötigen dafür einen PDF-Viewer - z.B. den Adobe Reader oder Adobe Digital Editions.
eReader: Dieses eBook kann mit (fast) allen eBook-Readern gelesen werden. Mit dem amazon-Kindle ist es aber nicht kompatibel.
Smartphone/Tablet: Egal ob Apple oder Android, dieses eBook können Sie lesen. Sie benötigen dafür einen PDF-Viewer - z.B. die kostenlose Adobe Digital Editions-App.
Zusätzliches Feature: Online Lesen
Dieses eBook können Sie zusätzlich zum Download auch online im Webbrowser lesen.
Buying eBooks from abroad
For tax law reasons we can sell eBooks just within Germany and Switzerland. Regrettably we cannot fulfill eBook-orders from other countries.
aus dem Bereich


